New Book Covers

We won't have a deep dive this month, but a major artwork update that I hope you will enjoy! Here are new covers I designed and illustrated, soon to be published as well as their concepts. I am working with a slew of genres, so I have included that info for the sake of comparison. 

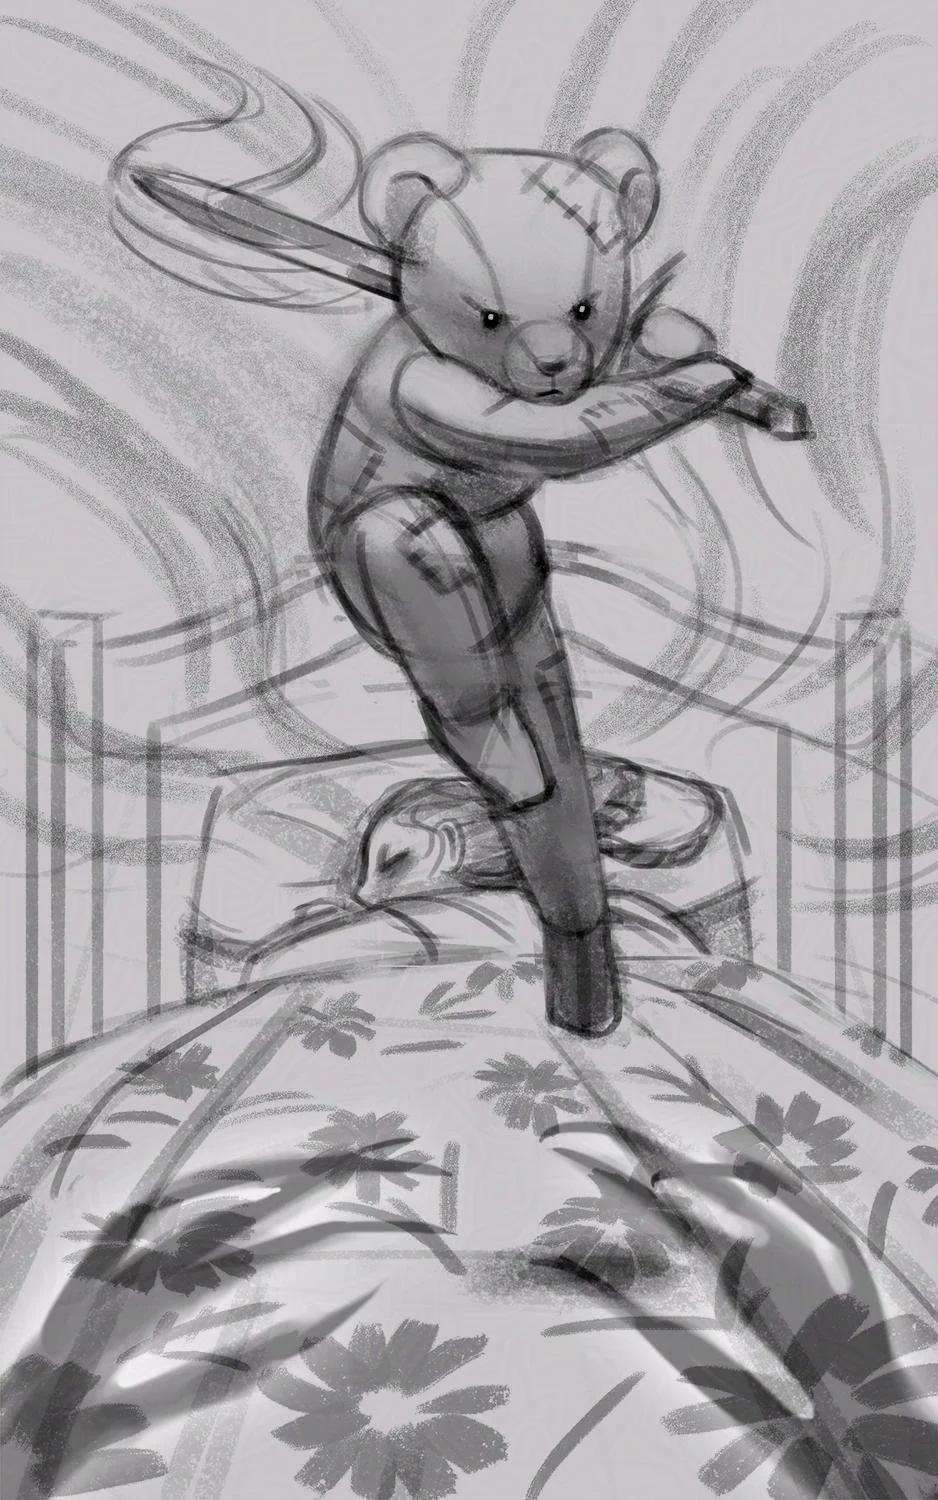
I love designing motifs and shiny things; lucky for me I had both for Buddy the Night. The motif frame provided a classic fairytale look that was perfect for the teddybear knight. 

Genre: Middle Grade Fantasy

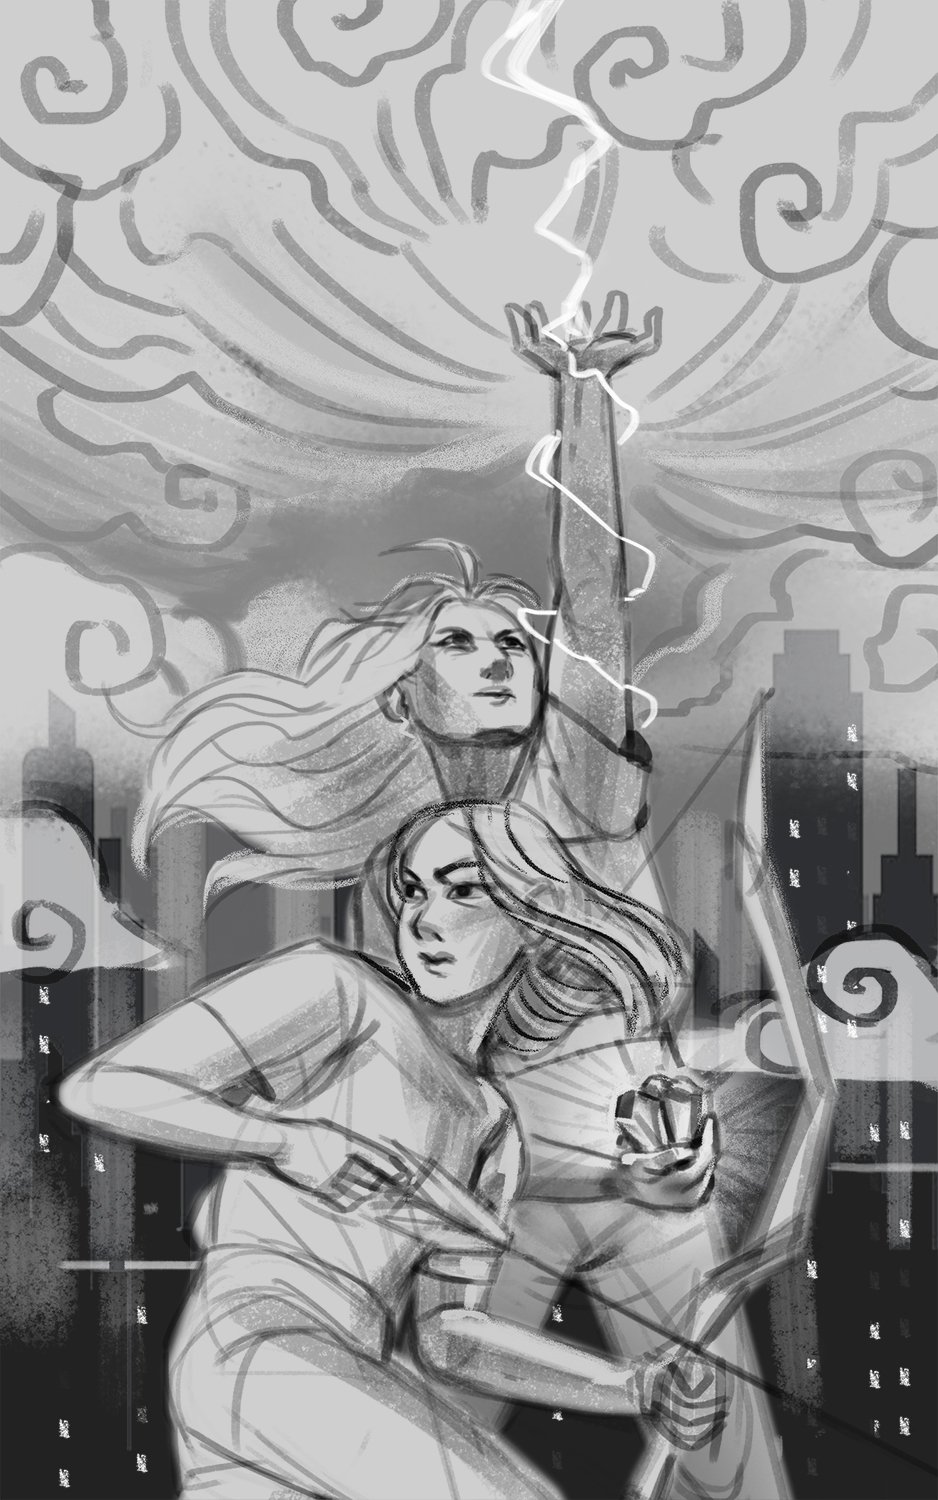
Clash of Crystals also uses a framing element like Buddy the Knight. The novel is a little bit of "Avatar the Last Airbender" meets "Hunger Games". That plus the references to graphic novels in the story led me to channel my inner manga-ka and use graphic elements and linework. The anime room in my heart never left me. :)

Genre: YA Urban Fantasy (Trial, Dystopian)

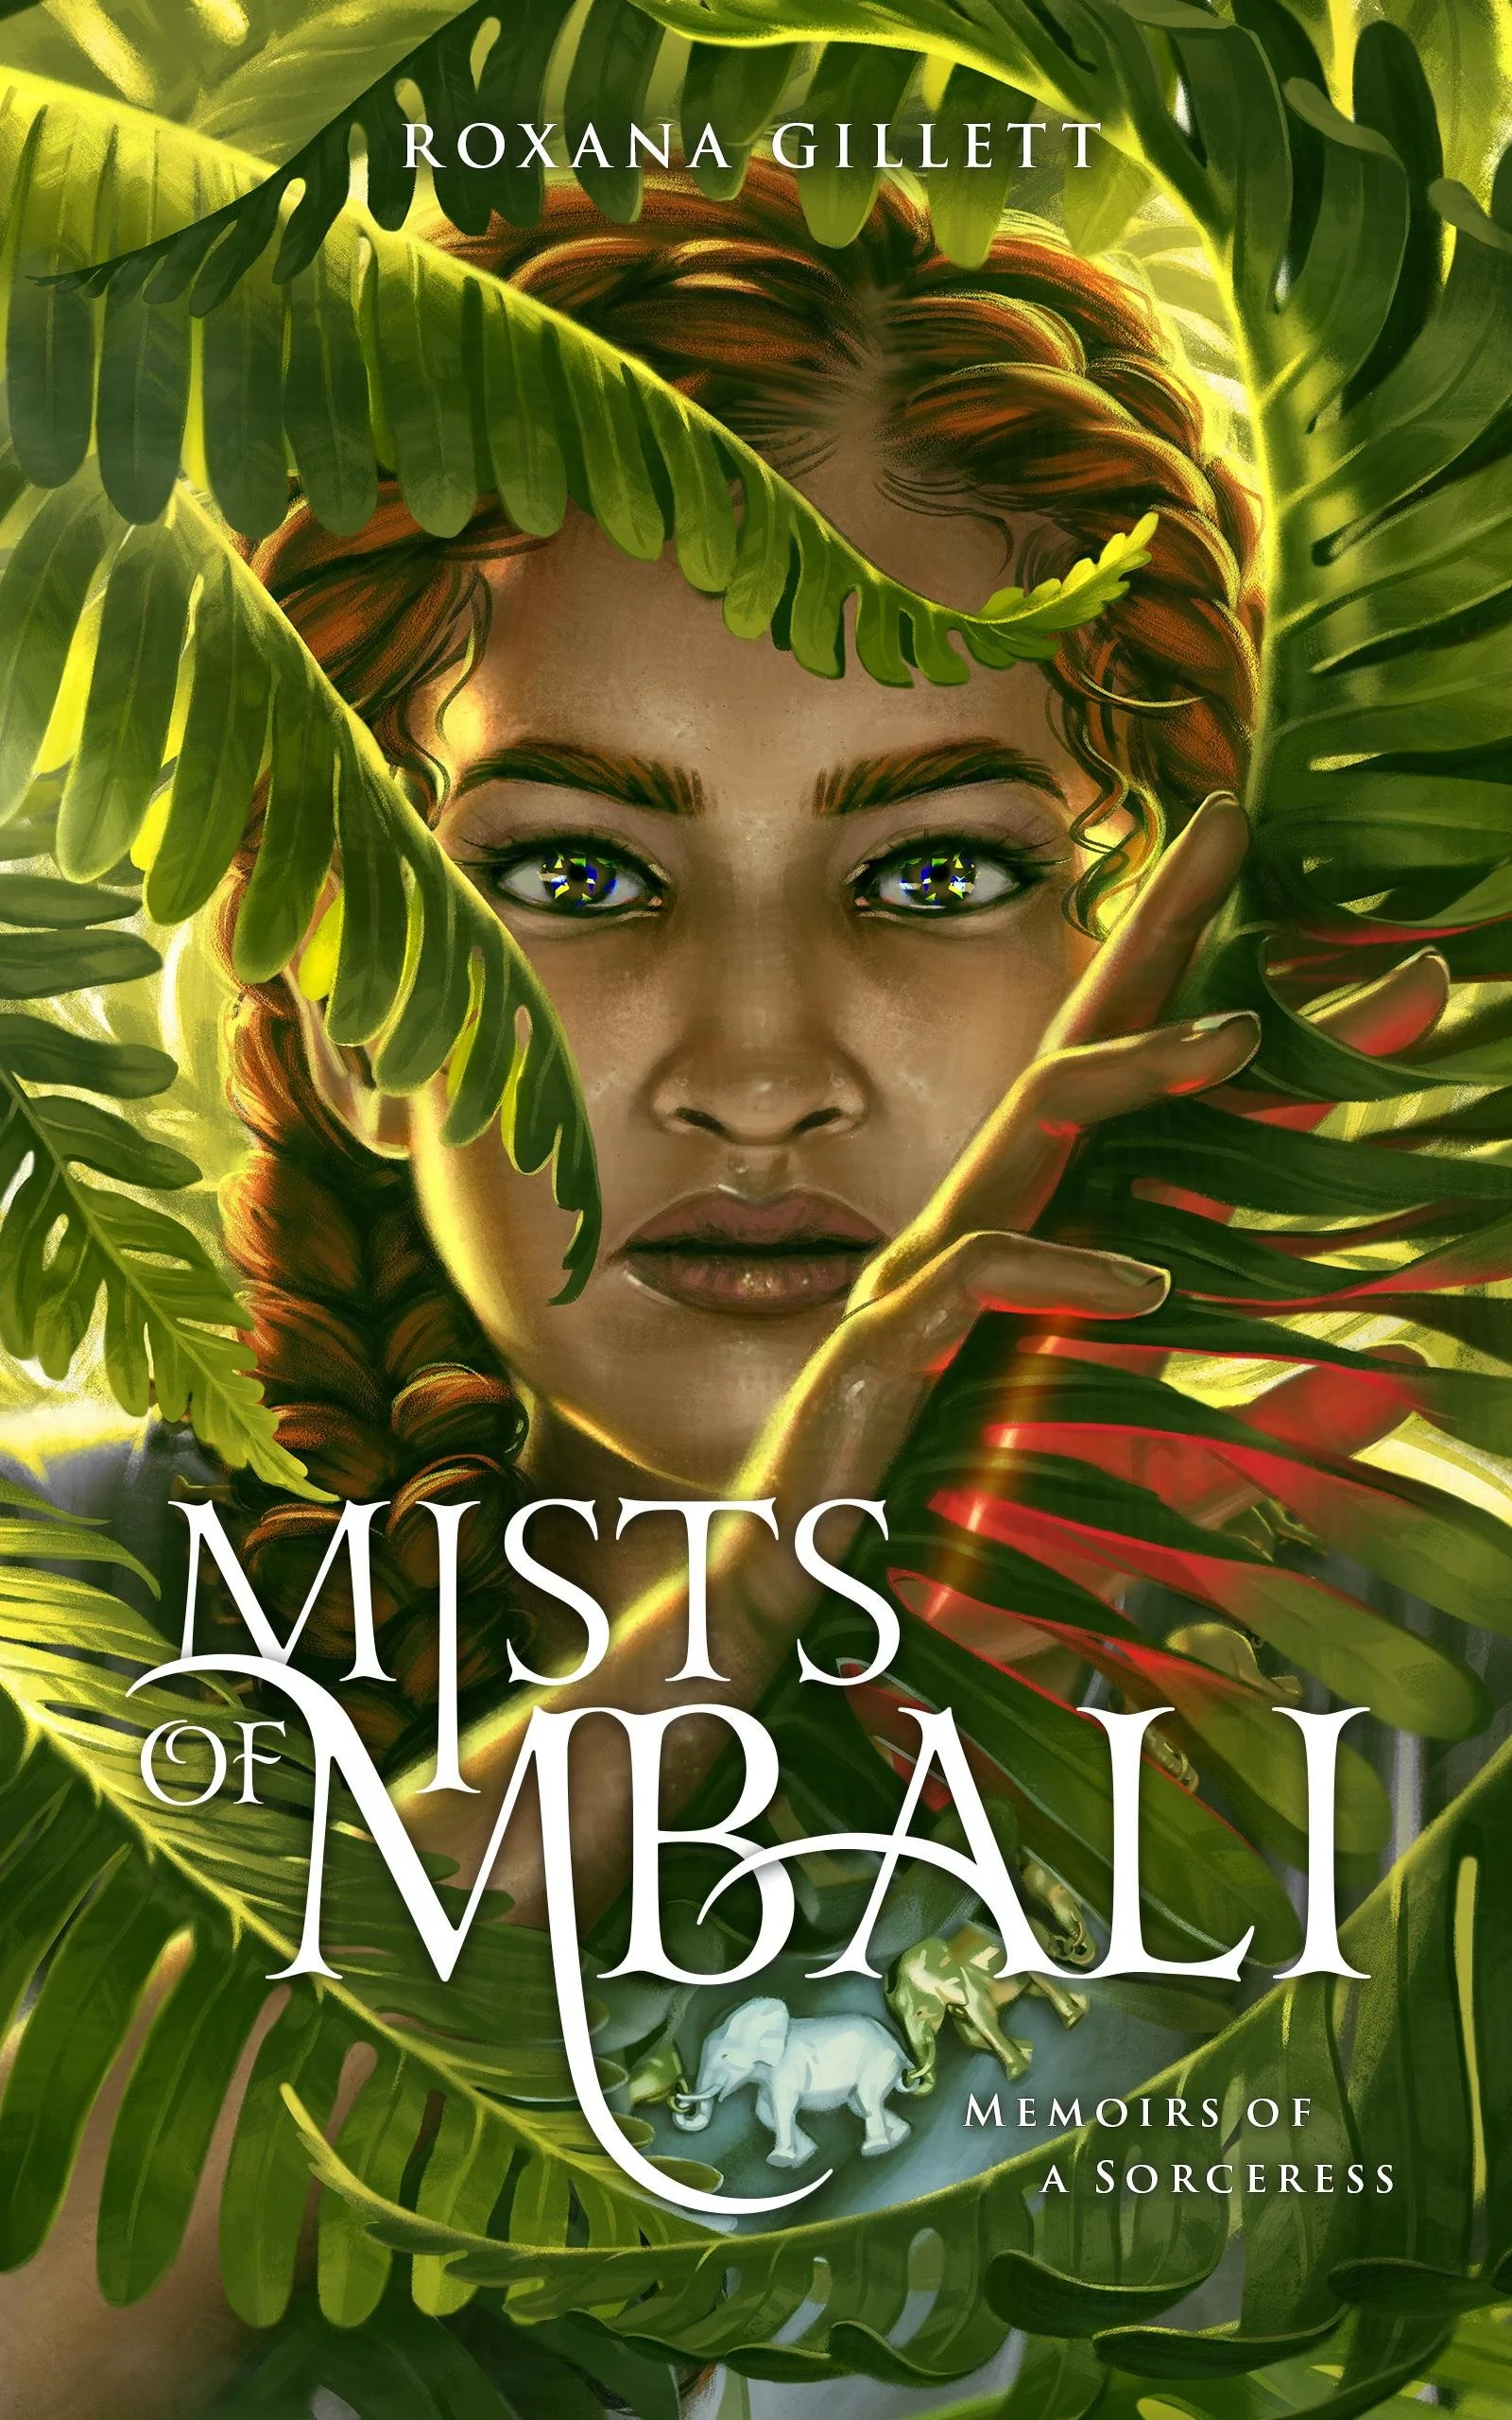
Mists of Mbali has elements of realism along with mysticism and magic. It was important to highlight the protagonist's eyes and hint at other magic elements.

Genre: YA/New Adult Urban Fantasy

How I Use Photoshop Brushes

Photoshop has been around for more than a hot second and with it are a huge range of default brushes and add-ons. For anyone just starting to paint or draw in photoshop, the Basic Round Brush is the best to start with. Once you have a good handle on the round brush and understand how to adjust different brush settings, get experimenting. Figure out what traditional medium you gravitate toward (watercolor, oils, colored pencil), and that will inform your decisions on what brushes to use.

Less is more for your brush arsenal. There are brushes that can "stamp" finished shapes like flowers and eyes that you should avoid. Painting everything with the same one or two brushes will look more cohesive. Of the brushes I will talk about, the "Gouache Detail" brush in figure 1 is my main brush for roughly 70% of the time.

All of my brushes are found in Kyle Webster's brush packs with some minor setting changes. For all of them, I made a copy of the brush as a "New Brush Preset" by clicking the gear icon. When you do that, you need to uncheck "Capture Brush Size in Preset" and "Include Tool Settings". This way, you can use the same brush shape as an eraser, mixer brush, smudge tool, etc. You may have to turn on the brush pressure on manually when you do this.

Brush Functions

My brushes can be broken down into 3 functions, which are annotated in the above chipmunk with a, b, and c. These functions are:

  • soft, gradual shading (a), encompassed above by a soft circle

  • hard-edge "planar" shading (b), indicated with planar lines, like a 3D mesh

  • streaky, contour shading (c), represented above with arrows

My favorite brush, which is demonstrated in figure 1 below, covers all of the functions, but I still use a few selected brushes that specialize in 1 function:

The following corresponds with the figure number and functions from above:

  1. Gouche Pastel- (a,b,c)

    • This is my favorite and most versatile brush for me. The brush is rectangular with a thick and a thin side of the virtual tip to let you shade large areas as well as draw details. There is also a defined edge to a rectangular brush that makes "planar" shading easier. Think of facets on a crystal. By defining planes on faces, fabric, and other objects, it helps create a sense of dimension.

    • For both the brushes in figures 1 and 2, the brush shades differently when you hold continuously vs picking up the Wacom pen and making repeated strokes. In the top left corner of figure 1 is a continuous stroke with increasing pen pressure that is smooth in texture. The top right of figure 1 shows separate strokes that build up a more grainy texture. I build up my shading with the grainy texture method. 

    • I can't remember where this brush came from, but it might be from an earlier Megapack by Kyle Webster. It resembles oil pastel as well as some of the gouache brushes in current packs. I have it available for a free download below. Make sure that Shape Dynamics>Angle Jitter>Pen Tilt is on and that Size Jitter is off.

  2. "Gouache Blair"- Gouache Pack (a)

    • This brush is a recent favorite that pairs well with the Gouache Pastel brush. The taper is much sharper, making this brush great for things like hair, fur, and rim light. It also works incredible well for foliage, capturing thin stems and tapering leaf shapes more fluidly than my Gouache Pastel brush. 

  3. "Shady Graphite 2"- Megapack (a)

    • This brush is used briefly in my overall process, but it's still great. I incorporated this brush as a substitute for the default soft round brush. The smoothness of the default round brush takes away some of the texture I want, so the subtle texture of Shady Graphite is preferable. I use it when I need large areas with a gradual change in value.

  4. "Gouache Round Bristle"- Gouache Pack (c)

    • This is a lovely fluid brush similar to a dry brush with a round tip. This is great for hair, similar to Gouache Blair, but is better for larger clumps of hair or hair in action that is more impressionistic. I have also found it to be a great brush for fire and in some cases, fabric. "Gouache Bristle Super Dry" is from the same pack and I use it for the same applications.

Figure 5 an example of the Gouache Pastel Brush in use. I am using a shape layer for the ball to make it easier to paint inside the silhouette. I isolate shapes when I make complex compositions to help streamline my process. The drawback is that edges are too sharp and synthetic by default. I bring in a different set of Smudge brushes to create edge variation.

Figure 9 demonstrates 2 brushes used for similar hairy purposes. The left side is thick fur made with the Gouache Round Bristle brush. The right side is more volumetric hair painted with Gouache Blair. I will often combine these together for a more natural look as using Gouache Blair by itself is a little more stylized than my goal for semi-realism.

Figure 10 demonstrates how I might use the Gouache Blair Brush for foliage in addition to hair shown in Figure 9. Flowers and other plants have leaves and petals that can be simplified into 2-3 planes. They are made of simple shapes, but assembled together it can be quite detailed and overwhelming. Painting them in a planar method makes it possible to paint a field of flowers realistically without your hand falling off.

Mixer Brushes

Mixer Brushes are popular for digital painters and can be used in the same way as Smudge Brushes for solid pixels. The brush dynamics are different from Smudge Brushes and may take some fiddling with. I find the best use for Mixer brushes to be smooth, oily, and painterly styles. I don't use Mixer Brushes as much because the Smudge Brushes tackle both pixels on transparent areas as well as solid pixels. I also have been moving away from using the mixer brush for technique reasons since I want to keep my grainy under-layer visible as much as possible.

Figure 7 is example of using a Mixer Brush on an edge. Mixer Brushes need pixels to mix, so it will not work in the same way on pixels that border transparency. Instead, it pushes the pixels around and has a sharp edge. You can use the "Sample All Layers" feature to remedy this, but it will change the edge control of your shape if you are working with multiple layers and introduces lag on big canvases.

Smudge Tool

The Smudge tool is a misleading name for what functions more like a brush when using custom settings. The best way for me to describe it is that I use Mixer Brush more for "dragging" paint and Smudge Tool for "scrambling" in a controlled manner.

Figure 6 has the same shading as figure 5 but with edge variation and a brighter highlight. I am using the Smudge Tool with "Grit Smudge" Smudge Brush from Kyle's Drawing Box in the Megapack as well as the Dry Media pack. The "Basic Smudge" from the Dry Media Pack is also great for a more intense blurred edge. Grit Smudge does a good job of softening edges without completely losing the silhouette.

Figure 8 shows another Smudge Brush that I use, which is the Scraper found in the Dry Media pack. This example shows how it can be used for fine fur or hair, but it can also be used in fewer strokes to create edges with action lines.

The above example shows 2 different Smudge Brushes in action. Brackets with "1" indicate where I have used the "Grit Smudge" Smudge Brush to soften receding edges. Bracket "2" shows where I used the "Scraper" Smudge Brush to soften furry areas, which also have a few strokes of defined hairs on top made with the Gouache Blair Brush. 

If you made it this far, congratulations! Reward yourself by gazing upon this Merfrog I have recently painted to celebrate the end of MerMay.

In other recent news, I have joined a new social media and portfolio platform called Cara, which is making the news headlines as one of the fasted growing Apps. Meta recently implemented new predatory AI-training policies (on top of shady data policies to begin with), prompting an exodus of artists to Cara. Cara is for human-made art only and is like a breath of fresh air knowing everything on your newsfeed is "real" and not plagiarized AI imagery. Cara is worth checking out and shows how much people value the protection of their creative works. 

Protecting Your Art Against Theft

"Cover Story" Reception September 8

I am excited to share an upcoming art show that features my book cover art along with some of the originals that I displayed at my Press Coffee show, "Whimsey Wanderings". This show is in collaboration with an Iowa City community art group, Artifactory. Save the date and come to the beginning where I will give a little shpeel about the art on display. The reception is one night only on September 8, but the display will be up from August 22 to October 23 in case you can't make it.


Protecting Your Art

Lets talk about what has been on creative's mind recently from writers to actors, musicians to visual artists: art theft. Art theft refers to using copyrighted creative content without the permission and/or credit of the creator. The content is typically stolen for commercial gain, but claiming another's art under your name or a different name is also art theft regardless of money being made. Art theft has been present since the beginning, but it is seeing an increase due to new technology that makes it easy to steal.

The most sophisticated form of plagiarism has entered the scene in the form of generative AI. AI has had a huge presence in the media with the popularity of ChatGPT and Midjourney. I first want to make a distinction that AI alone is a neutral technology, like fire. It has an equally great propensity for good as it does harm. There are some amazing and positive uses for AI that I am seeing in applications like the medical field where it is helping doctors diagnose faster and more accurately. We are mostly talking about the harmful side in this article because at the moment, generative AI is posing a greater threat than boon to creatives. Like fire, AI can be very, very harmful.

We will not go into all of the ways that generative AI is unethical in its current state. Our focus will be on the steps you can take now for protecting your art (specifically visual art). For more information on the legal and ethical issues with generative AI, check out this petition trying to bring about conversation and change on the subject. It also has useful links to organizations that focus on rights for creatives.

Here are a few ways that can help with preventing AI theft and general art theft. They are in no particular order and most can be easily managed with some vigilance.

Digitally Cloak with Glaze

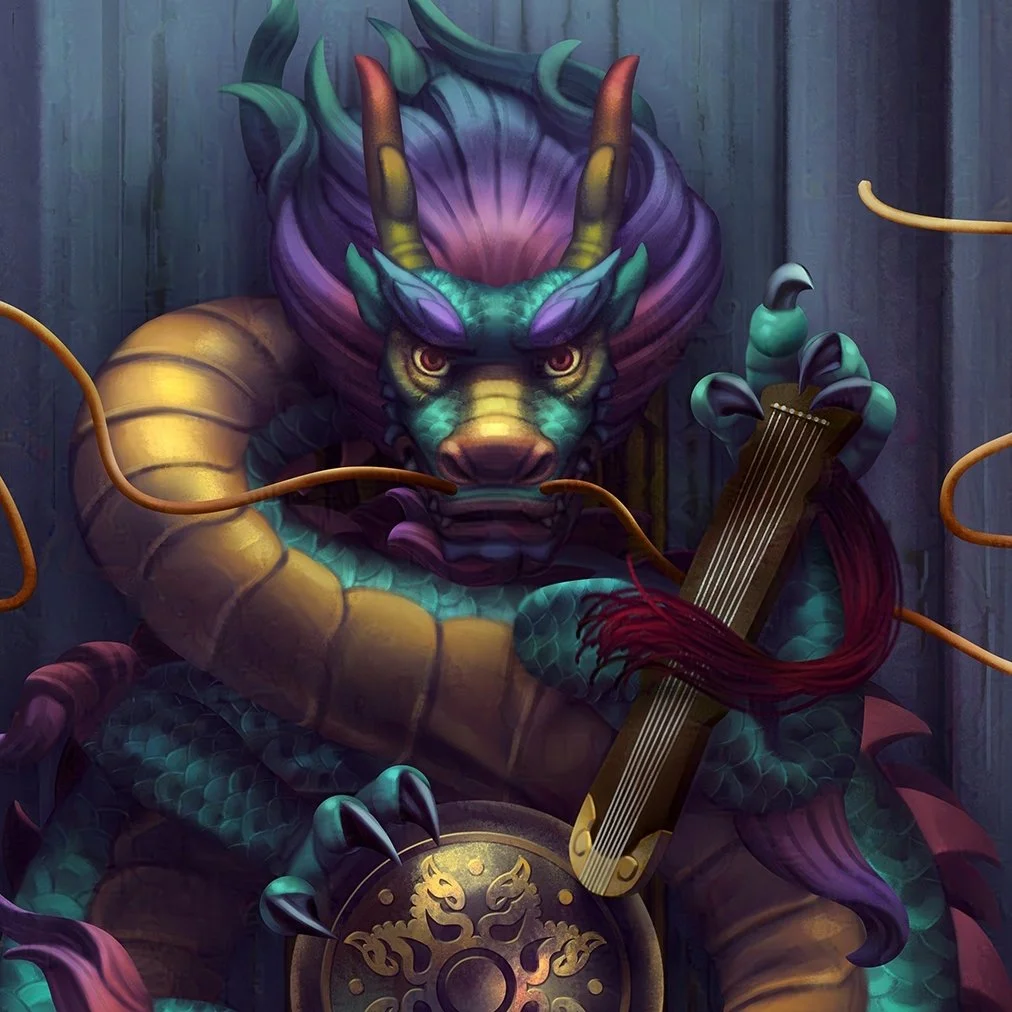
This is a brand new software that you download and run your images through that makes it hard for AI to replicate. It creates a little bit of a pixelly pattern overlay that is noticeable on close inspection, but is good enough for the average viewer's attention span. In the end, the visual differences are worth the protection. It does take a looooong time to process one image (it's almost two hours on my computer for the default setting), so make plans to run it at night or when you have some down time. Glaze continues to improve and may become speedier with future updates.

Here you have the glazed version on the left. The pattern of the glaze overlay can be seen most noticeably on the gold scales which have broad areas of smooth gradation. Some areas actually look nice with the extra texture, like the background which has old painted wood panels.

File for Copyright

To be clear, an artist owns the rights to their work upon its creation in the US, but if you want to be able to take infringers to court and be awarded damages, filing for copyright gives you that extra protection. It's relatively cheap, you can file online, and you can register a body of work at the same time.

Opt-Out of Uncompensated AI Training

Many apps are by default use the data you give them (personal info, social media posts, images) to train AI or in some cases sell to third parties. Only now are we seeing some small changes pushing companies to be more transparent about data use. Some of that data, especially on art websites like DeviantArt and ArtStation, is being used to train generative AI. ArtStation and DeviantArt just as they disclosed the use of user's images being used as training data this year followed with the option to opt-out. This may be a moot point for artwork existing on the website that was already scraped before those options materialized, but you can still be proactive for newly uploaded art. Take a look at the data collection policies on the websites you upload images to and take steps to prevent feeding into AI training models. Opt-out if you have the option.

Here is the opt-out option on Art Station in the account settings. Data sharing settings can be found in your account section across different apps/platforms.

Mark Your Images

Putting your name on your artwork is not a big deterrent for AI, but it is going to make people think twice when it comes to traditional methods of art theft. If they take your art images and erase your name, they will knowingly commit art theft and that will deter some. There are also genuine art appreciators who may be not familiar with best practices for crediting and don't put your name in captions or posts. Having your name on the image ensures that people know who the artist is wherever it goes. More great information about watermarks and signatures can be found on one of my favorite blogs for illustration, Muddy Colors.

This is my approach to marking my art with my website in the lower left.

Display Low-Res Versions Only

Never put your full resolution images on your website. It is not necessary for viewing, creates lag for your website, and gives art thieves more options for printing your stolen art at a high quality. Images for social media needn't be more than 1200px-1500px on the longest side at 72dpi. That's a good limit for your portfolio images as well.

Add A Copyright Disclaimer to Your Website

Giving potential art thieves a warning can be an effective deterrant. Your website should have a copyright disclaimer, which you can add visibly without being overbearing. The disclaimer I use in my website footer, which you are welcome to copy-paste is: 

ALL IMAGES CONTAINED HEREIN © FIRSTNAME LASTNAME, UNLESS OTHERWISE SPECIFIED. NO IMAGE MAY BE USED IN PART OR ENTIRETY WITHOUT WRITTEN PERMISSION.

Expose Art Theft When it Happens

Public shaming is an affective deterrent for art theft. If you see a company selling pirated art, spreading the word online through your social circles can have a great influence on their reputation and pressure them to remove the pirated art. When it comes to AI images, it can be hard for some people to spot the signs and there is no obligation for a company or individual to mark images as AI generated. Encourage your art-appreciating friends to research the artist they are buying from to see their process images. That can help with identifying ethically-made art.

Support Ethical AI

There is a world where artists benefit from generative AI. As it currently stands, there are no generative AI tools that compensate creatives for their data, to my knowledge. It is important to define what AI developers can do to make their products ethical towards creatives, which is to train AI with data that has been obtained with explicit permission and fairly compensate the copyright owners (artists or to those who purchased the copyright) for it. This is no different than the concept behind art licensing, a common practice for companies paying an artist to use existing artwork for a new commercial purpose under a defined contract.

Browsing through some "centaurs" on Midjourney presents us with nightmare fuel or accurate, but uninspired herculean types. Midjourney trains their AI on artist's work without consent and is not a source for ethical art.

As a final note, if you are an aspiring artist who has been dispirited by the advent of generative AI, remember that you have a unique voice both in the messages you illustrate and the style you craft. For all its wonders, generative AI still has its limitations for creating complex art that is cohesive and depicts imaginative content (it fails at centaurs pretty hard and things that don't exist in general). Also, many companies will not purchase AI-generated images because they need to purchase art with legal protections (not granted to AI images). There is still a market for your art and so many people who want to buy beautiful things made by human hands.