Procreate Vs. Photoshop Part 2

Last month I shared about some adventures in Procreate from the perspective of a Photoshop user. I have a few more insights to add and some conclusions that surprised me!

Reference photo from photographer Engin Akyurt. Brush comparison in Procreate. Re-shading the same sketch with different brushes is a great way to see their qualities!

My original goal was to recreate the feel of Photoshop in Procreate, but I also found that I liked Procreate for different uses. With the above study, I tested out two brushes that I liked after a lengthy narrowing-down process. The left example was made with a gouache style brush with the hopes of finding something like the Kyle gouache brushes for Photoshop. The right example was made with a brush from the Jingsketch Basics pack that I had used and was a little intimidated by at first, but had noticed potential. I stuck with it and enjoyed using it so much that I decided to pursue this smooth, art deco flavor with an additional study!

The Edge Control brush is one that could only work well in Procreate. The brush dynamics that make it so fluid and have a controlled, but organic taper from the hard edge to the soft edge would not work in Photoshop. Procreate excels at line-based brushes, so it's no mystery that comic artista love it. It is also useful for the contour control needed for modern/art deco styles and calligraphy. 

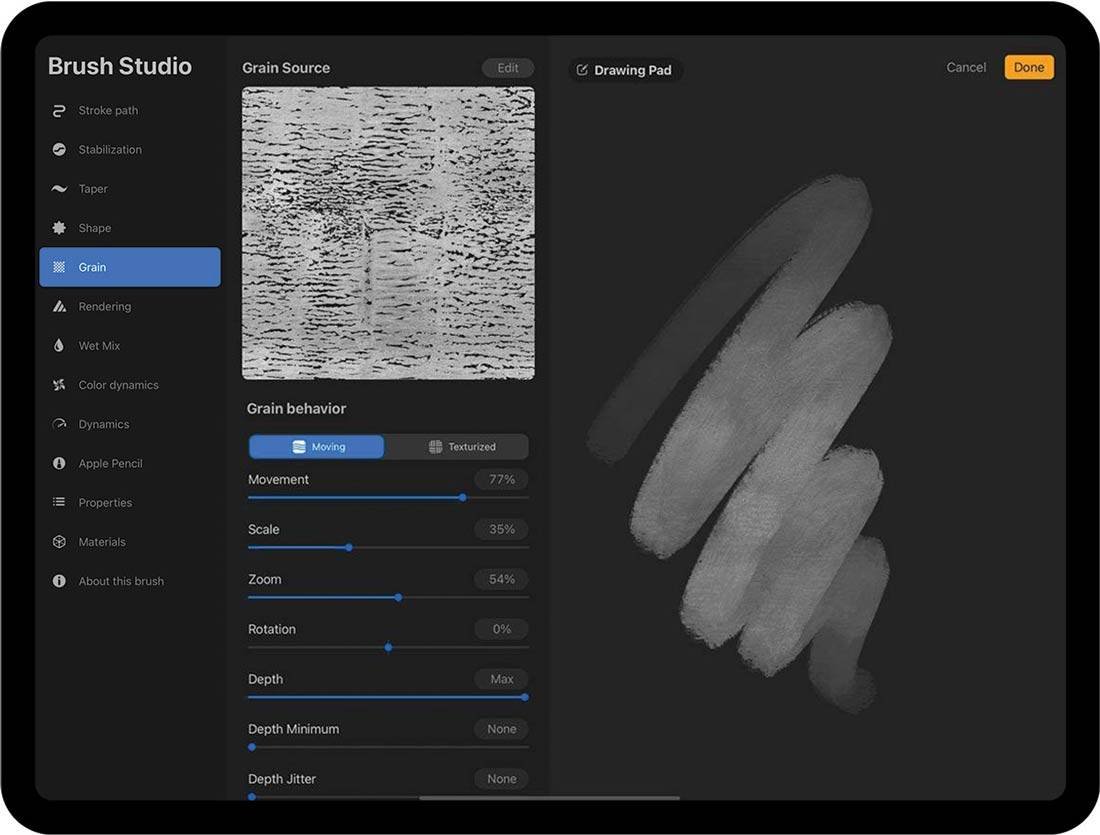
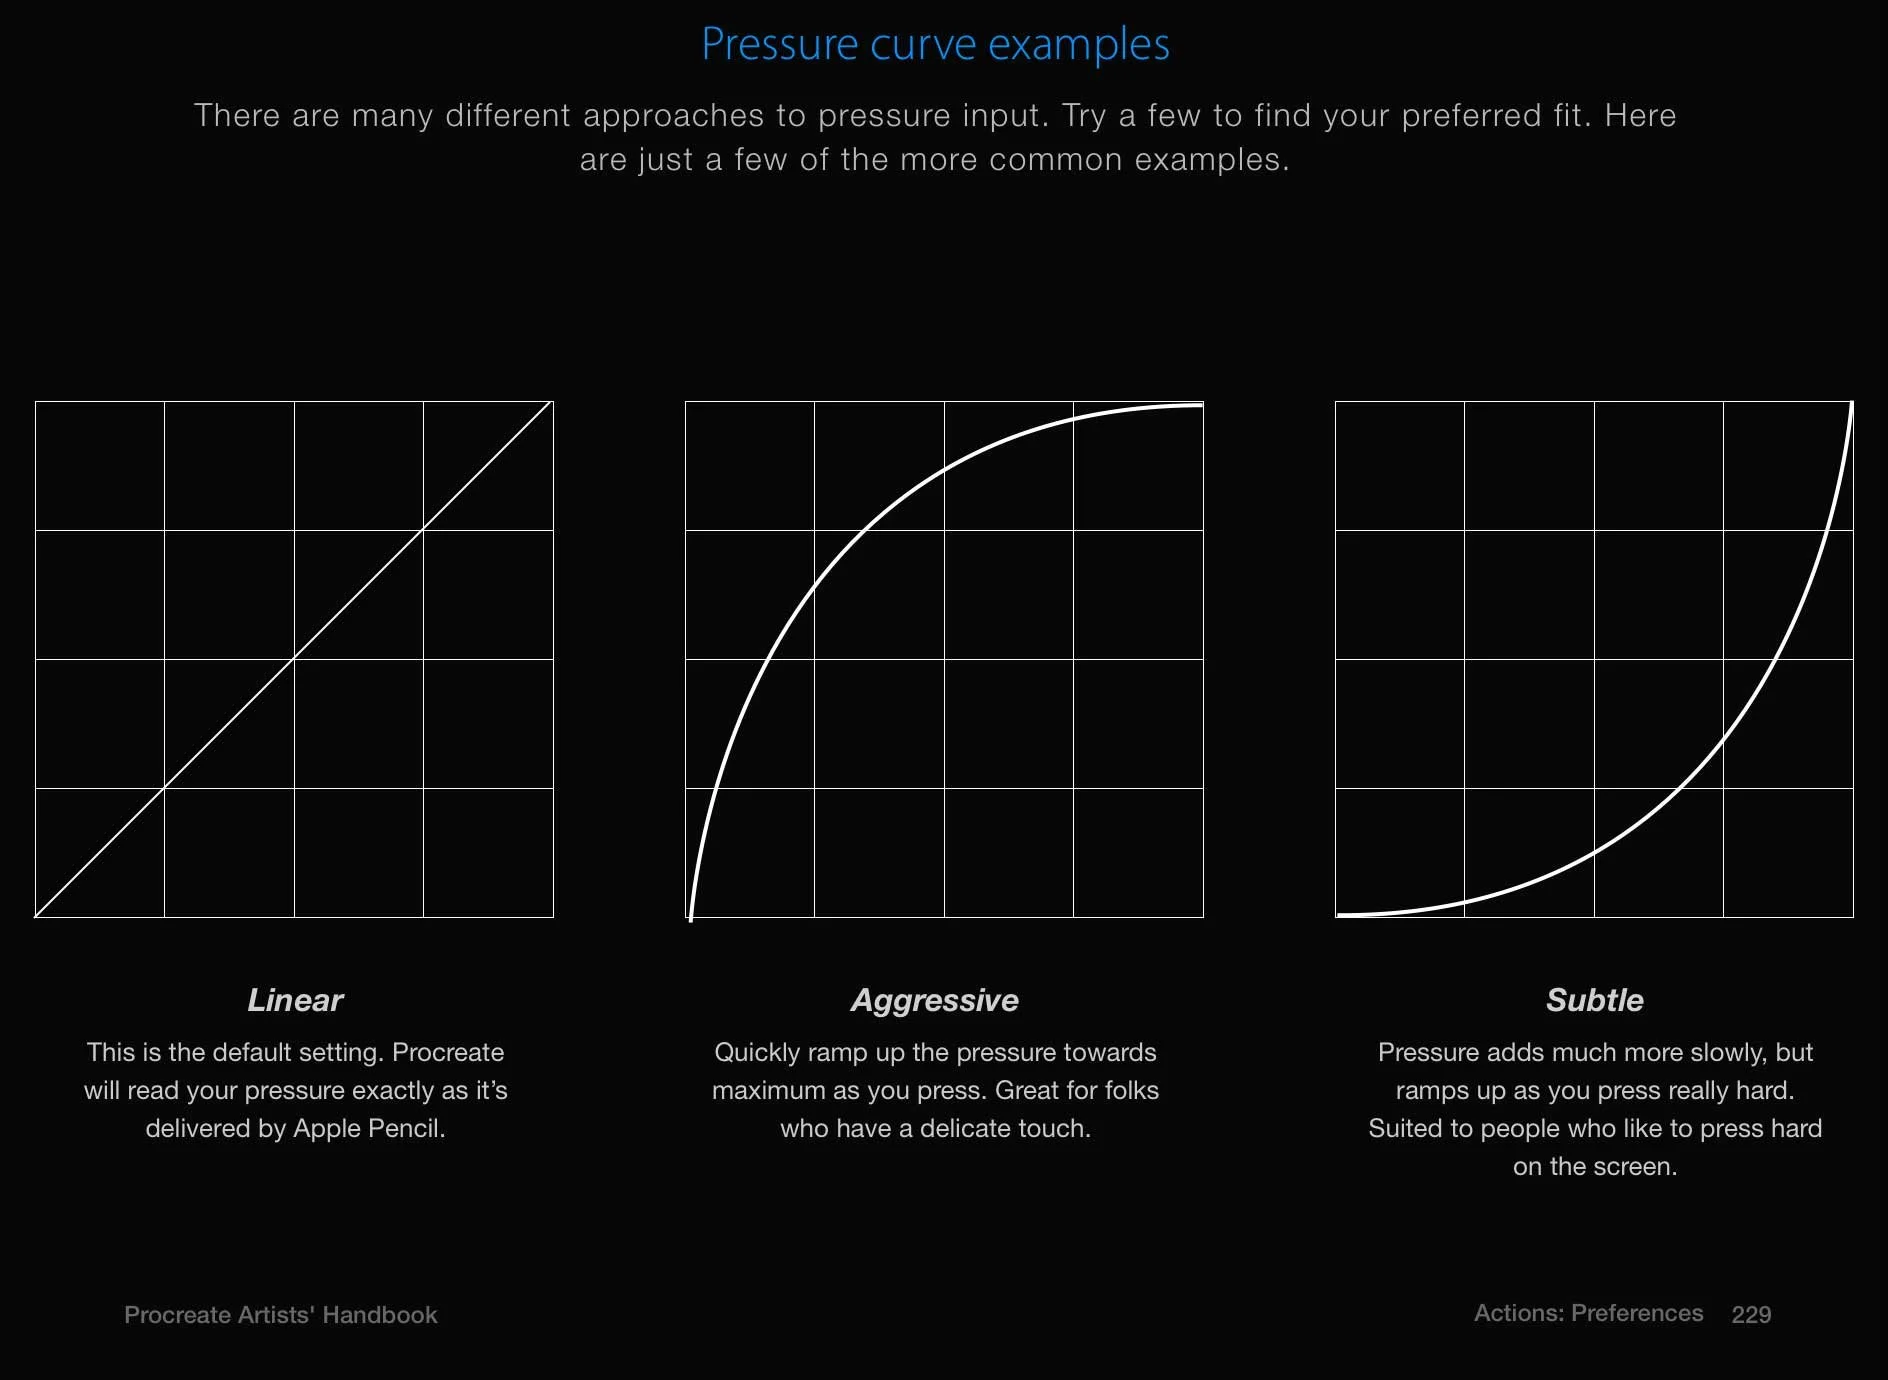
Above are the brush settings for Procreate and wow-eee are there a bunch of toggles. The number of brush features on the left side seems to be about the same as Photoshop, but within each feature, there are a greater number of settings. Finding a pre-made brush you like and messing around with the settings a little is more approachable than building a brush from scratch.

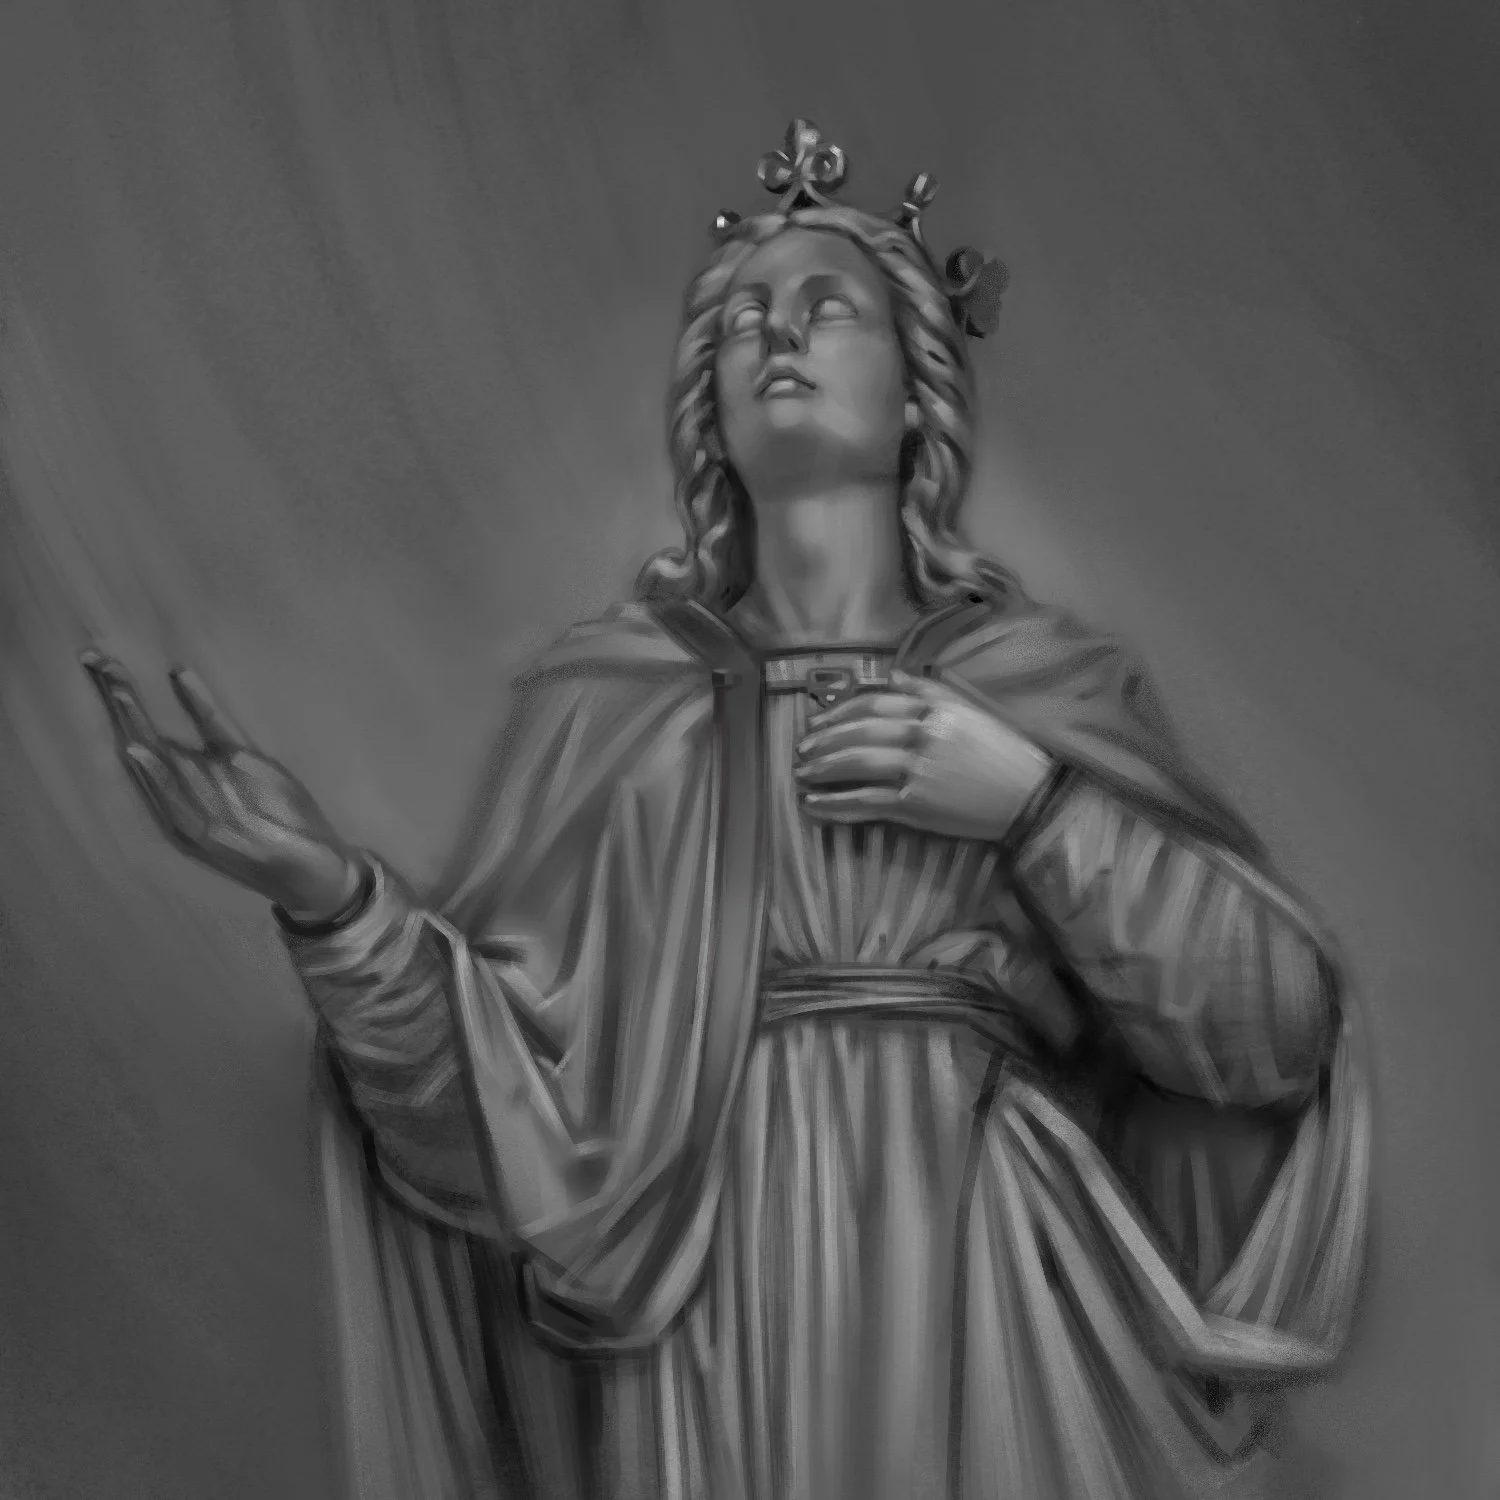
A painting study in Procreate using Jingsketch's Edge Control brush.

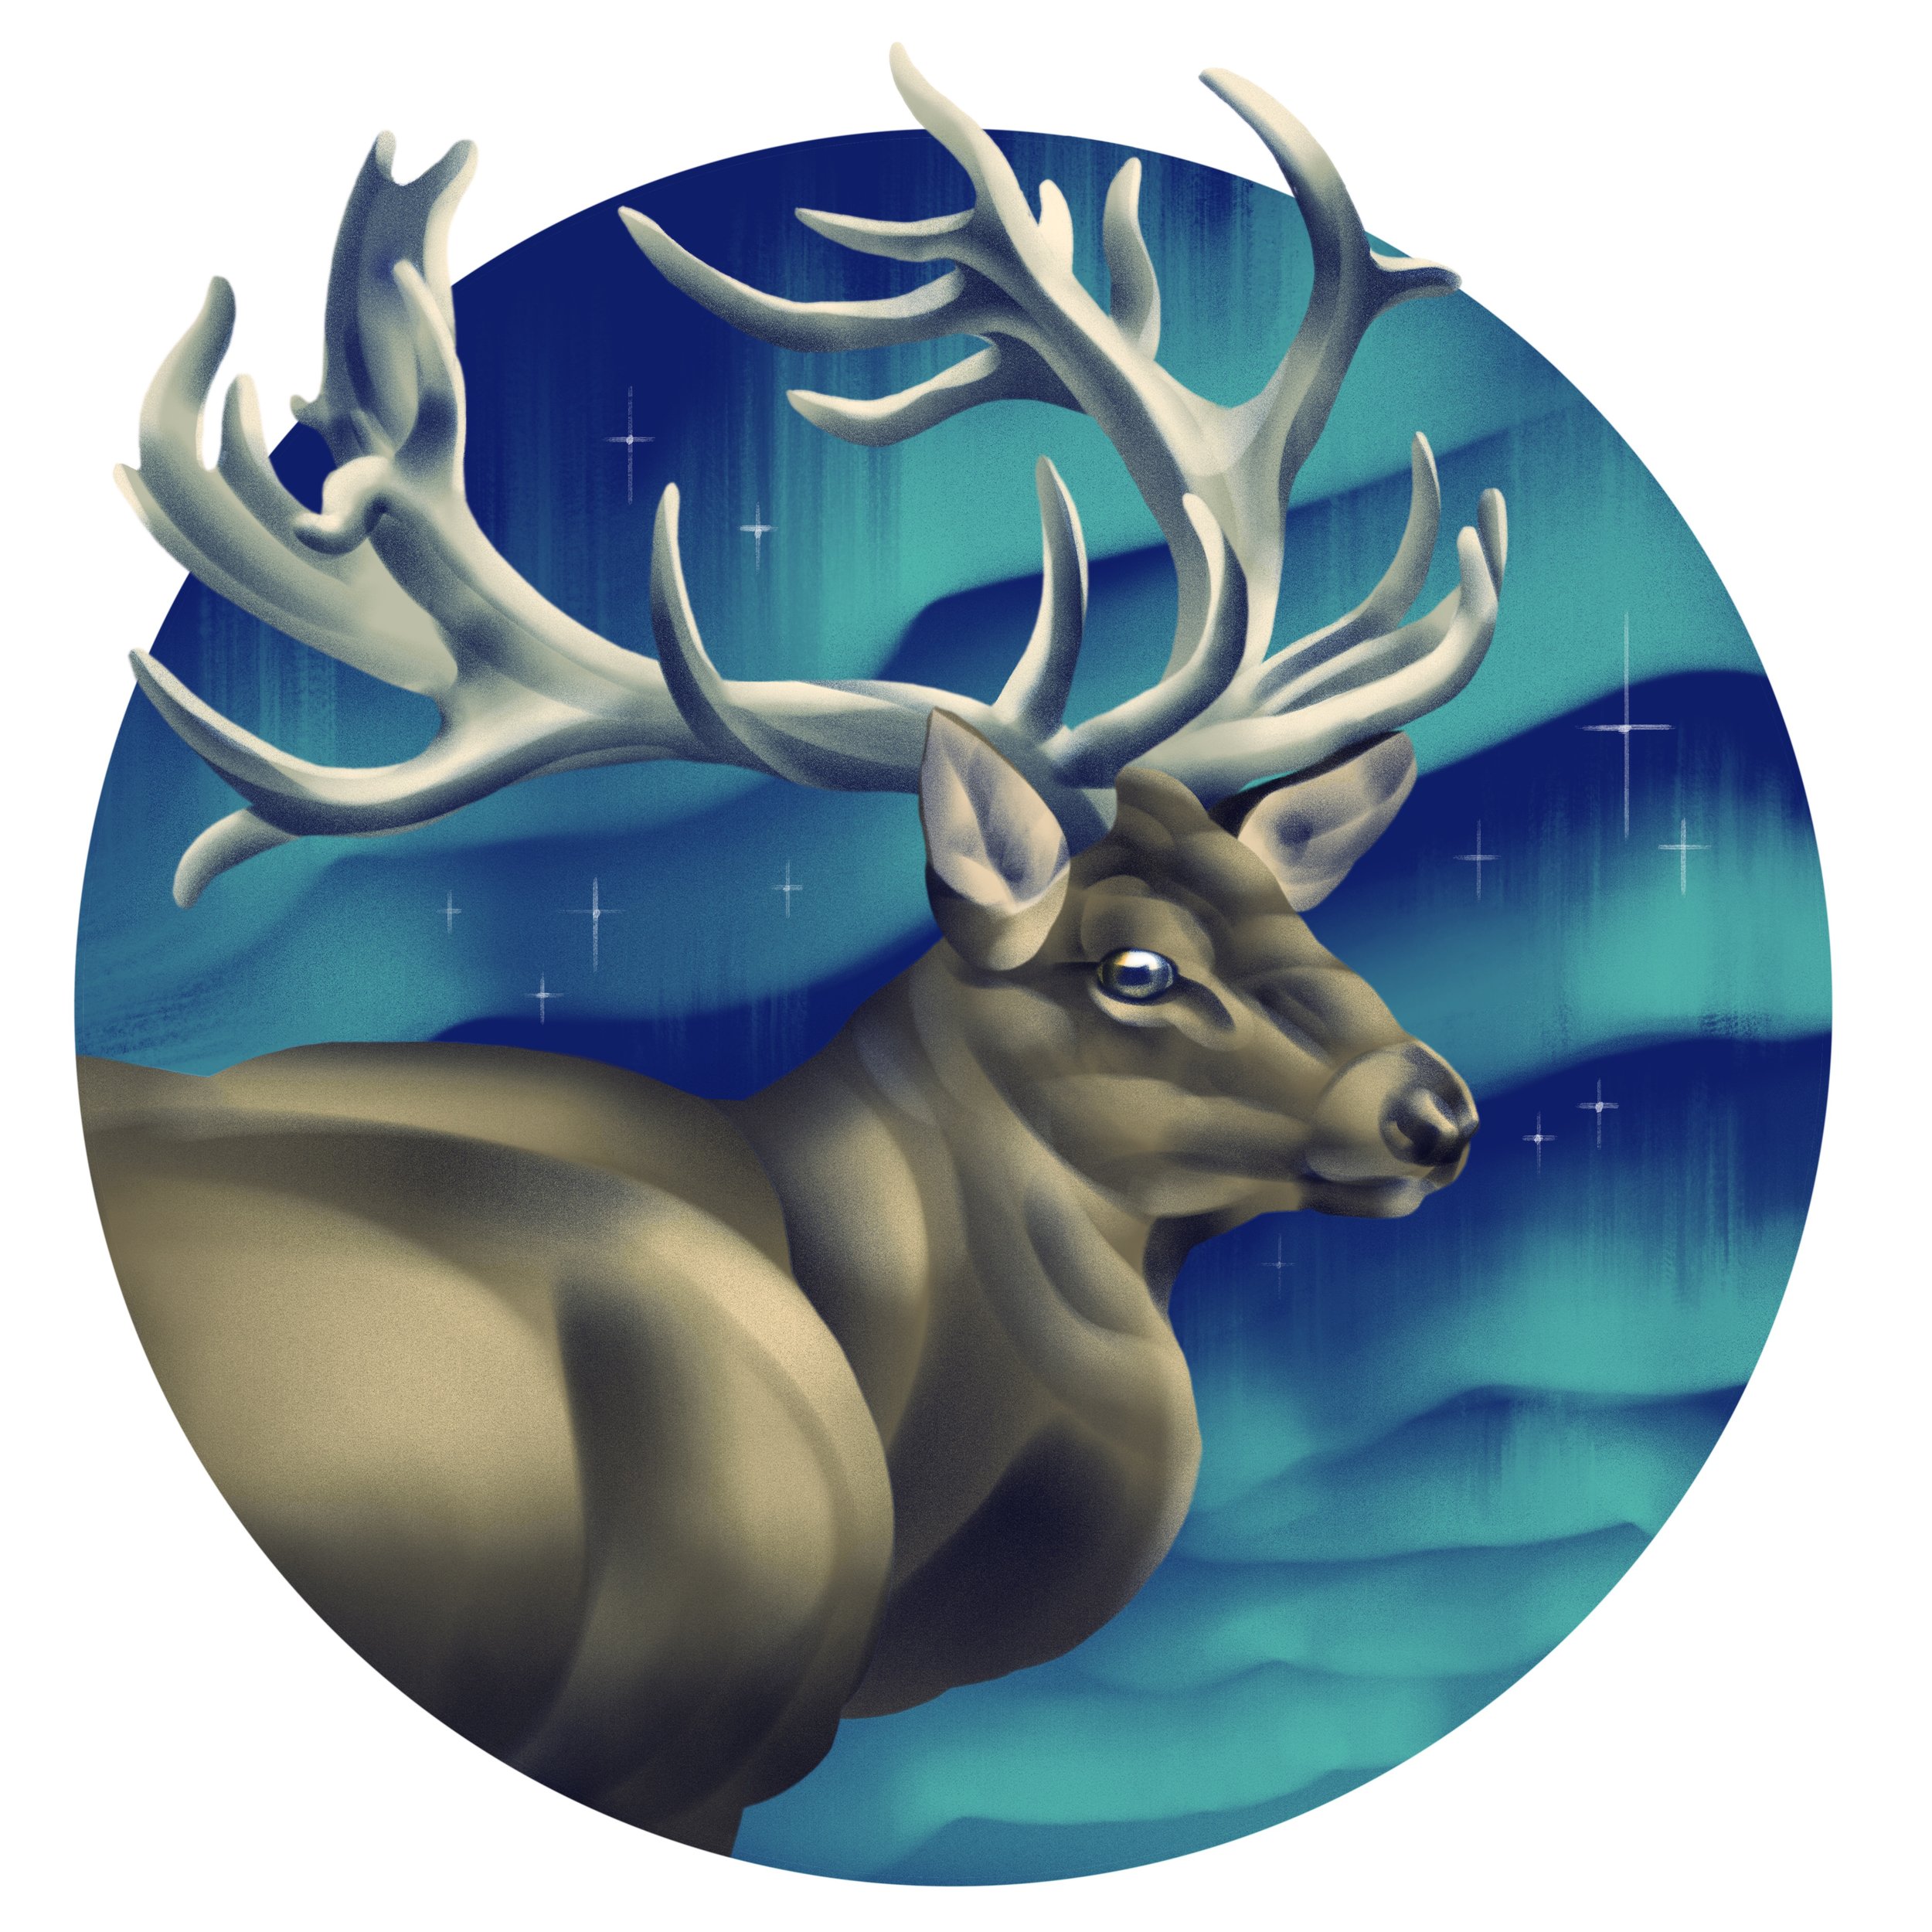
Here is the second attempt with the Edge Control brush to see if I could make a more polished illustration with it. The plane-defining nature of the brush called for a graphic approach and informed the direction of the composition. The shading style for this elk gave some freedom to exaggerate shapes while also being systematic in a way that feels natural for how I like to build shadows and highlights. 

In conclusion, Procreate and Photoshop have the same basic structure, but have unique strengths depending on the use. For my purposes, Procreate is amazing for sketching and encourages me to experiment more. I can't sit in bed or at a cafe with my massive iMac and do photoshop sketches, but I can take the iPad anywhere and fill my time with drawing when I might otherwise melt my brain with social media. While Photoshop is also available for iPad, the interface for Procreate is well-suited for a small device. Photoshop has better tools for the complex illustrations I make for my book covers and posters, such as vector shapes, photo-editing tools, and typography options. I went in thinking I could recreate my same Photoshop techniques in Procreate and came out with a completely different approach for illustrating!

As a side-note and public service announcement, another tool has become available for protecting artists and their copyrighted images against AI plagiarism. It is called Nightshade, which is made by the same team that made Glaze. Nightshade deters the unethical scraping of copyrighted images by making very small changes to the pixels of your images. AI training models will go on to ascribe the wrong description to the “Nightshaded” images because of those changed pixels, weakening the model. Hopefully, this will help AI developers understand the importance of training on copyrighted data through consent.

Illustrating Wings and Dynamic Compositions

I am happy to announce that my "Cover Story" exhibit that was up at Artifactory is going to have a new location! It is moving to Pappajohn Biomedical Discovery Building (PBDB) on the University of Iowa Campus. The art will be up from November 8 to March 1, 2024, with the building accessible to visitors from 7am-6pm Monday-Friday. This is a beautiful location on the skywalk between buildings. They even have a Java house in PBDB so you can grab a coffee while browsing. There will be a short reception on Nov 16 from 4:30-5:30pm. All are welcome!

With all of the busyness this year, I did not get around to sharing one of my favorite covers. It's a YA fantasy with bird people and dragons. What's not to love? I will share how I refined this composition to make it more dynamic and how I utilized reference material for believable wings. 

Below are the preliminary sketches featuring two of the main characters. It was a no brainer to include a dragon and it was also important to show the relationship between the two characters. That narrowed down the scope of possibilities, which is helpful when you have a hundred directions to go in for a book cover.

We went with the third sketch which has the best narrative clarity showing the two characters preparing to fight the dragon. It also illustrated the spirit world from the novel in the top part of the composition, which gave it an advantage over the other two. 

For this cover, I branched out to explore expressive glyphs in the title font. There were also key elements in the composition to utilize for overlap effects, such as the floating shapes. I made an effort to give the title some effervescence by using loopy letters that complimented the wispy background. 

With the concept phase completed, I set out gathering my usual reference material for all parts of the illustration. I use indirect reference for nature-based content, like wings. Keep in mind that wings are just big flappy hands, which is a helpful basis for anatomy and disturbing thoughts of chicken people. 

Above is my page of reference just for wings. I look up the birds that the figures are based on and use a flying fox for the dragon wings. Pro tip is to use big bats instead of small bats for dragon wing reference as the proportions and physics will be closer. Big bat wings are really bendy under all that weight and the anatomy is easier to see. Also they're cute, so treat yourself.

You might ask why I have so many bird wing references? This is because there is no perfect reference wrapped into one image (unless you pose a model or maquette), so I have one photo that gives insight into back-lighting, another for the general pose, and then one photo might be perfect for just one of the wings. 

These are the 3D models I used for the figures and the dragon. This gives me the best information for lighting, anatomy, and perspective. It's not the perfect reference, but I can synthesize it with my reference photos of real animals to get the right balance of realism and believability. Both of these models are from Daz3D, which is my go-to for people especially because I can pose quickly and customize faster than models built from scratch. 

Here is an annotated version of the characters to help you understand what I take or don't take from the reference image. I am making comparisons to the cover sketch of the figures and decide what is a helpful improvement and what should be disregarded in terms of lighting and pose. Most of the reference from this image is adopted, but the poses of the hands are not naturalistic. I take some photos of my own hands, which gives me better reference. 

That's about half of my reference material for this book, so there is even more where this came from. Good, accurate reference material is your friend!

Iowa City Gallery Walk This Friday, October 13

We have the official Iowa City Gallery Walk map for this Friday! Come see me at #15, which is the Artifactory gallery— also listed as Arts Iowa City on google maps. Artifactory is located in a multi-business church building that is adjacent to Pop’s BBQ. The gallery is in the basement, so you will be going down steps (there is also a small elevator). For parking, you might check street parking in the Northside and walk via the alleyway at Marco’s Grilled Cheese.